
hello world
Thank you
代碼:
<p id="f-1"> hello world </p>           上方的: hello world
<b id="f-2"> Thank you </b>             上方的: Thank you
<script>
  function showA() {
    var f_a = document.getElementById('f-1');
    f_a.style.color = 'red'; }
  function showB() {
    document.getElementById('f-2').style.background ='#bbb'; }
  function showC() {
    var f_c = document.getElementById('f-2');
    f_c.style.cssText = 'font-size: 20px; color: purple;'; }
  function showD() {
    var f_a = document.getElementById('f-1');
    f_a.innerHTML = "Welcome ! 映美集"; }
  function showE(xx) {
    document.getElementById('f-1').style.color = 'black';
    document.getElementById('f-1').innerHTML = "hello world";
    xx.value ="已重置 p";  xx.style.boxShadow="2px 2px 3px #f9f";}
</script>
例如:
<p id="foo"> hello world </p>
<script>
  var foo = document.getElementById('foo');          // 取得目前頁面上的 foo元素
  foo.style.color = 'green';                         // 將 <p> 的文字字體顏色改成綠色
  (或者 document.getElementById('foo').style.color = 'green'; )
  foo.style.background = 'gray';                     // 將 <p> 的背景顏色改成灰色
</script>
如果 CSS 屬性名稱中有 - (例如 background-color),你可以用 [] 的語法,
或將屬性名稱改用駝峰式 (camel case) 的寫法:
   foo.style['background-color'] = '#f00';   // 將背景顏色改為紅色
   foo.style.backgroundColor = '#f00';       // 將背景顏色改為紅色   (camel case 寫法)
   foo.style.background = '#f00';            // 將背景顏色改為紅色   (camel case 寫法)
   foo.style['margin-top'] = '100px';        // 將 margin-top 設為 100px
   foo.style.marginTop = '100px';            // 將 margin-top 設為 100px   (camel case 寫法)
| Property 屬性 | 說明 ( 屬性名稱 使用駝峰式(camel case)的寫法) |
|---|---|
| animation | 所有動畫屬性的簡寫屬性,除了 animationPlayState 屬性 |
| background | 在一個聲明中設定或傳回 所有 背景屬性。 例如: document.getElementById("myDIV").style.background = "url('smiley.gif') blue repeat-x center"; 例如: document.body.style.background = "#f3f3f3 url('img_tree.png') no-repeat right top"; |
| backgroundColor | 設定或傳回元素的 背景顏色 |
| border | 在一個聲明中設定或傳回 borderWidth、borderStyle 和 borderColor 例如: document.getElementById("myDiv").style.border = "1px solid #0000FF"; |
| borderColor | 設定或傳回元素的 邊框顏色 |
| borderRadius | 設定或傳回所有四個 borderRadius 屬性的簡寫屬性 |
| boxShadow |
將一個或多個陰影附加到框,設定元素的「容器陰影」 例如: document.getElementById("myDIV").style.boxShadow = "10px 20px 30px blue"; |
| color | 設定或傳回 文字的顏色 |
| cssFloat | 設定或傳回元素的 水平對齊方式。 left | right | none(預設值)。 |
| font | 在一個聲明中設定或傳回 fontStyle、fontVariant、fontWeight、fontSize、lineHeight 和 fontFamily |
| fontSize | 設定或傳回 文字的字體大小 |
| fontStyle | 設定或返回 字體樣式是 正常、斜體還是傾斜 |
| fontWeight | 設定或傳回 字體的粗度。 normal | lighter | bold | bolder |
| height | 設定或返回元素的高度 |
| width | 設定或返回元素的寬度 |
| lineHeight | 設定或返回 文本中行與行之間的距離 |
| left | 設定或返回 定位元素的 左側位置 |
| right | 設定或返回 定位元素的 右側位置 |
| top | 設定或返回 定位元素的 頂部位置 |
| bottom | 設定或返回 定位元素的 底部位置 |
| margin | 設定或傳回元素的 外邊距(最多可有四個值) |
| marginTop marginBottom marginRight marginLeft | 設定或傳回元素的 外邊距(上、下、右、左) |
| padding | 設定或傳回元素的 內邊距(最多可有四個值) |
| position | 設定或傳回元素所使用的 定位方法類型(static, relative, absolute or fixed) |
| textShadow | 設定或傳回 文字的陰影效果 |
| visibility | 設定或返回 元素是否可見。 visible | hidden |
| zIndex | 設定或返回定位元素的堆疊順序。 auto(預設值) | number(整數:數字大的堆疊順序在上面) |
用法:
<p id="foo"> hello world </p>
<script>
  var foo = document.getElementById('foo');
  alert(foo.style.cssText);                   // 輸出 "" 空字串,因為 foo 上沒有設定 style 屬性
  foo.style.cssText = 'font-size: 20px; color: purple;';  // 將 foo 的字體大小設為 20px、字體顏色設為紫色
  alert(foo.style.cssText);                   // 輸出 font-size: 20px; color: purple;
</script>
語法:
var style = window.getComputedStyle(element, pseudoElement);
參數 element表示一個HTML DOM元素;pseudoElement是一個選擇性參數,用來指定 pseudo-element。
window.getComputedStyle === document.defaultView.getComputedStyle 兩個都指向同一個方法。
範例:
<style>
#elem {
    position: absolute;
    left: 100px;
    top: 200px;
    height: 100px; }
</style>

<div id="elem" style="top:50px;"> hello world </div>
<script>
  var elemA = document.getElementById('elem');
  alert(window.getComputedStyle(elemA).getPropertyValue('height'));   //顯示 100px
  alert(window.getComputedStyle(elemA).getPropertyValue('top'));      //顯示 50px

pseudo-element 的例子:
<style>
h3::after {
    content: ' rocks!';
  }
</style>

<h3> hello world </h3>
<script>
  var h3B = document.querySelector('h3');
  alert(getComputedStyle(h3B, ':after').content);   //顯示 " rocks!"
</script>
語法:
Element.currentStyle.cssProperty
其中 cssProperty 是 HTML 元素的 CSS 屬性名稱,採駝峰式 (camel case) 的寫法。
用法:
<style>
#elem {
    position: absolute;
    left: 100px;
    top: 200px;
    height: 100px; }
</style>

<div id="elem" style="top:50px;"> hello world </div>
<script>
  var elemC = document.getElementById('elem');
  alert(elemC.currentStyle.height);      //顯示 100px
  alert(elemC.currentStyle.top);         //顯示 50px
</script>
| 事件名稱 | 觸發條件 |
|---|---|
| blur | blur 物件失去焦點時 |
| focus | onfocus 當物件被點擊或取得焦點時 onfocusout 當物件失去焦點時。 |
| change | 物件內容改變時 |
| click | 滑鼠點擊物件時 |
| dblclick | 滑鼠連點二下物件時 |
| error | 當圖片或文件下載產生錯誤時 |
| keydown | 按下鍵盤按鍵時 |
| keypress | 按下並放開鍵盤按鍵後 |
| keyup | 按下並放開鍵盤按鍵時 |
| load | 網頁或圖片完成下載時 |
| mousedown | 按下滑鼠按鍵時 |
| mousemove | 介於over跟out間的滑鼠移動行為 |
| mouseout | 滑鼠離開某物件四周時 |
| mouseover | 滑鼠進入一個元素四周時 (懸停) |
| mouseup | 放開滑鼠按鍵時 |
| resize | 當視窗或框架大小被改變時 |
| scroll | 當捲軸被拉動時 |
| select | 當文字被選取時 |
| submit | 當按下送出按紐時 |
| load | 網頁或圖片完成下載時 |
| beforeunload | 當使用者關閉 (或離開) 網頁之前 |
| unload | 當使用者關閉 (或離開) 網頁之後 |
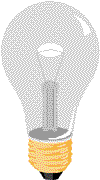
<button onclick="document.getElementById('bulb').src='images/bulbon.png'"
      onmouseout="this.style.color=''" onmouseover="this.style.color='red'">
      Turn on the light </button>          // onclick 觸發事件 改變燈泡圖
                                           // onmouseout 滑鼠離開物件四周時
                                           // onmouseover 滑鼠懸停四周時
<img id="bulb" src="images/bulboff.png" style="width:100px"> // 中間燈泡圖

<button onclick="document.getElementById('bulb').src='images/bulboff.png'">
        Turn off the light </button>         // onclick 觸發事件 改變燈泡圖

<button onclick="this.innerHTML ='點擊左側按鈕開關燈'"> 說 明 </button>
                                       // 使用 this 關鍵字 改變自身內容
<html>
<head>
  <title>inline event handling example</title>
</head>
<body>
  <button onclick="triggerAlert();"> click me </button>       // 按下button按鈕,會引發 triggerAlert()事件。

 <script>
   function triggerAlert() {
      alert('Hey');                                      // 當使用者點下button按鈕會跳出 "Hey"。
   }
 </script>
</body>
</html>
<html>
<head>
  <title>inline event handling example</title>
</head>
<body>
  <button onclick="triggerAlert(this);" data-name="Mike"> click me </button> // 單點button按鈕,會引發 triggerAlert()事件。
                                                                             // 傳入 this(代表此元素物件本身) 當參數
 <script>
   function triggerAlert(ele) {
      alert('Hey ' + ele.getAttribute('data-name'));                        // 當使用者點下button按鈕會跳出 "Hey Mike"。
   }
 </script>
</body>
</html>
<html>
<head>
  <title>traditional event handling example</title>
</head>
<body>
  <button id="foo"> click me </button>                    // 按下button按鈕,會引發 triggerAlert()事件。

 <script>
   function triggerAlert() {
      alert('Hey');                                      // 當使用者點下button按鈕會跳出 "Hey"。
   }
   var ele = document.getElementById('foo');
   ele.onclick = triggerAlert;                  // 當使用者按下 (id="foo")按鈕時,執行 triggerAlert 函數
  </script>
</body>
</html>
如果要取消綁定事件處理函數,將事件屬性值設為 null 就可以了:
ele.onclick = null;
<html>
<head>
  <title> addEventListener example </title>
</head>
<body>
 <script>
   function myAlert() {
      alert('Hey!');
   }
   document.addEventListener('click', myAlert);                  // 當使用者用滑鼠點擊頁面時,執行 myAlert 函數
   window.addEventListener('load', function() {                  // 當網頁載入時,執行這個 callback 函數
     alert('頁面已載入!');
   });
  </script>
</body>
</html>
addEventListener 相較於 DOM Level 0 的方法是它可以對一個元素同時指定多個事件處理函數:
<html>
<head>
  <title> addEventListener example </title>
</head>
<body>
 <script>
   function myAlert1() {
      alert('Hey!');
   }
   function myAlert2() {
      alert('Hello!');
   }
   document.addEventListener('click', myAlert1);             // 當使用者用滑鼠點擊頁面時,執行 myAlert1 函數
   document.addEventListener('click', myAlert2);             // 當使用者用滑鼠點擊頁面時,執行 myAlert2 函數
  </script>
</body>
</html>
在上面的例子中點擊頁面 依序 會跳出 "Hey!" "Hello!"。
但要特別注意的是依不同瀏覽器的實作,執行順序可能不會等於事件處理函數指定的順序。
<html>
<head>
  <title> removeEventListener example </title>
</head>
<body>
 <button id="foo"> click me </button>

 <script>
   function myAlert() {
      alert('Hey!');
   }
   var ele = document.getElementById('foo');
   ele.addEventListener('click', myAlert);                  // 綁定 click 事件處理函數
   ele.removeEventListener('click', myAlert);               // 移除剛綁定的 click 事件處理函數
  </script>
</body>
</html>
<html>
<head>
  <title> event flow example </title>
</head>
<body>
  <div>
      <ul>
         <li></li>
      </ul>
  </div>
</body>
</html>
  element.onclick = function(event) {
      // ...
  };

  // 或是
  element.addEventListener('click', function(event) {
      // ...
  });
在 IE9 以下的 DOM Level 0 或 attachEvent 方法不會傳入 event object,但有一個 global 的 window.event object 可以用來代替,
所以跨瀏覽器 (cross-browser) 的寫法可以改成:
  element.onclick = function(event) {
    event = event || window.event;
      // ...
  };
| 屬性 | 說明 |
|---|---|
| type | 返回事件類型,例如 "click" |
| target | 指向觸發事件的 DOM element |
| currentTarget | 在 event bubbling 階段中,指向目前執行的事件處理函數是綁定在哪個 DOM element 上 |
| timeStamp | 事件發生時的時間 timestamp (單位是 milliseconds 毫秒) |
| eventPhase | 返回為一個數字,表示事件處於目前所處的傳播狀態 (event flow),有這些值: 0: None 1: capturing phase 2: target phase 3: bubbling phase |
| 屬性 | 說明 |
|---|---|
| which | 當按下滑鼠按鍵,取得是哪個按鍵,可能的值有: 0: 非按鍵 1: 左鍵 2: 中鍵或滾輪 3: 右鍵 |
| relatedTarget | 指向參與事件的相關 DOM element。用在 mouseover 事件,表示剛離開的那個 DOM element; 用在 mouseout 事件,表示剛進入的那個 DOM element |
| pageX | 當按下滑鼠時 (或觸控螢幕時),取得距離頁面 (document) 最左上角的水平距離 (單位 pixel) |
| pageY | 當按下滑鼠時 (或觸控螢幕時),取得距離頁面 (document) 最左上角的垂直距離 (單位 pixel) |
| 屬性 | 說明 |
|---|---|
| keyCode | 當 keypress 事件時,返回 character code;當 keydown 或 keyup 事件時,返回 key code |
| which | 值同 keyCode |
| charCode | 當 keypress 事件時,返回 character code |
| altKey | 布林值 (boolean),用來判斷使用者是否有按 alt 鍵 |
| ctrlKey | 布林值 (boolean),用來判斷使用者是否有按 ctrl 鍵 |
| metaKey | 布林值 (boolean),用來判斷使用者是否有按 meta 鍵 |
| shiftKey | 布林值 (boolean),用來判斷使用者是否有按 shift 鍵 |
element.addEventListener('click', function(event) {
    event.stopPropagation();
    // ...
});
IE 在 IE9 開始才有支援 stopPropagation。
在 IE9 以下你可以使用 IE 專有的 cancelBubble 屬性 event.cancelBubble = true;。
element.addEventListener('click', function(event) {
    event.preventDefault();
    // ...
});
IE 在 IE9 開始才有支援 preventDefault。
在 IE9 以下你可以使用 IE 專有的 returnValue 屬性 event.returnValue = false;。
document.body.addEventListener('click', function(event) {
    event.target.style.color = 'yellow';                   // 把字體改成黃色
});
document.onkeydown = function(event) {
    if (event.keyCode === 89 && event.ctrlKey) {
        alert('你同時按下 "control + y"');
    } else if (event.which === 90 && event.ctrlKey ){
        alert('你同時按下 "control + z"');
    }
};
window.onbeforeunload = function(event) {
    return '你確定要離開本頁面嗎?';                  // 要離開或關閉目前頁面時,返回要顯示給使用者看的提醒文字
});